Artworks Moose Anamorphosis
The Brief
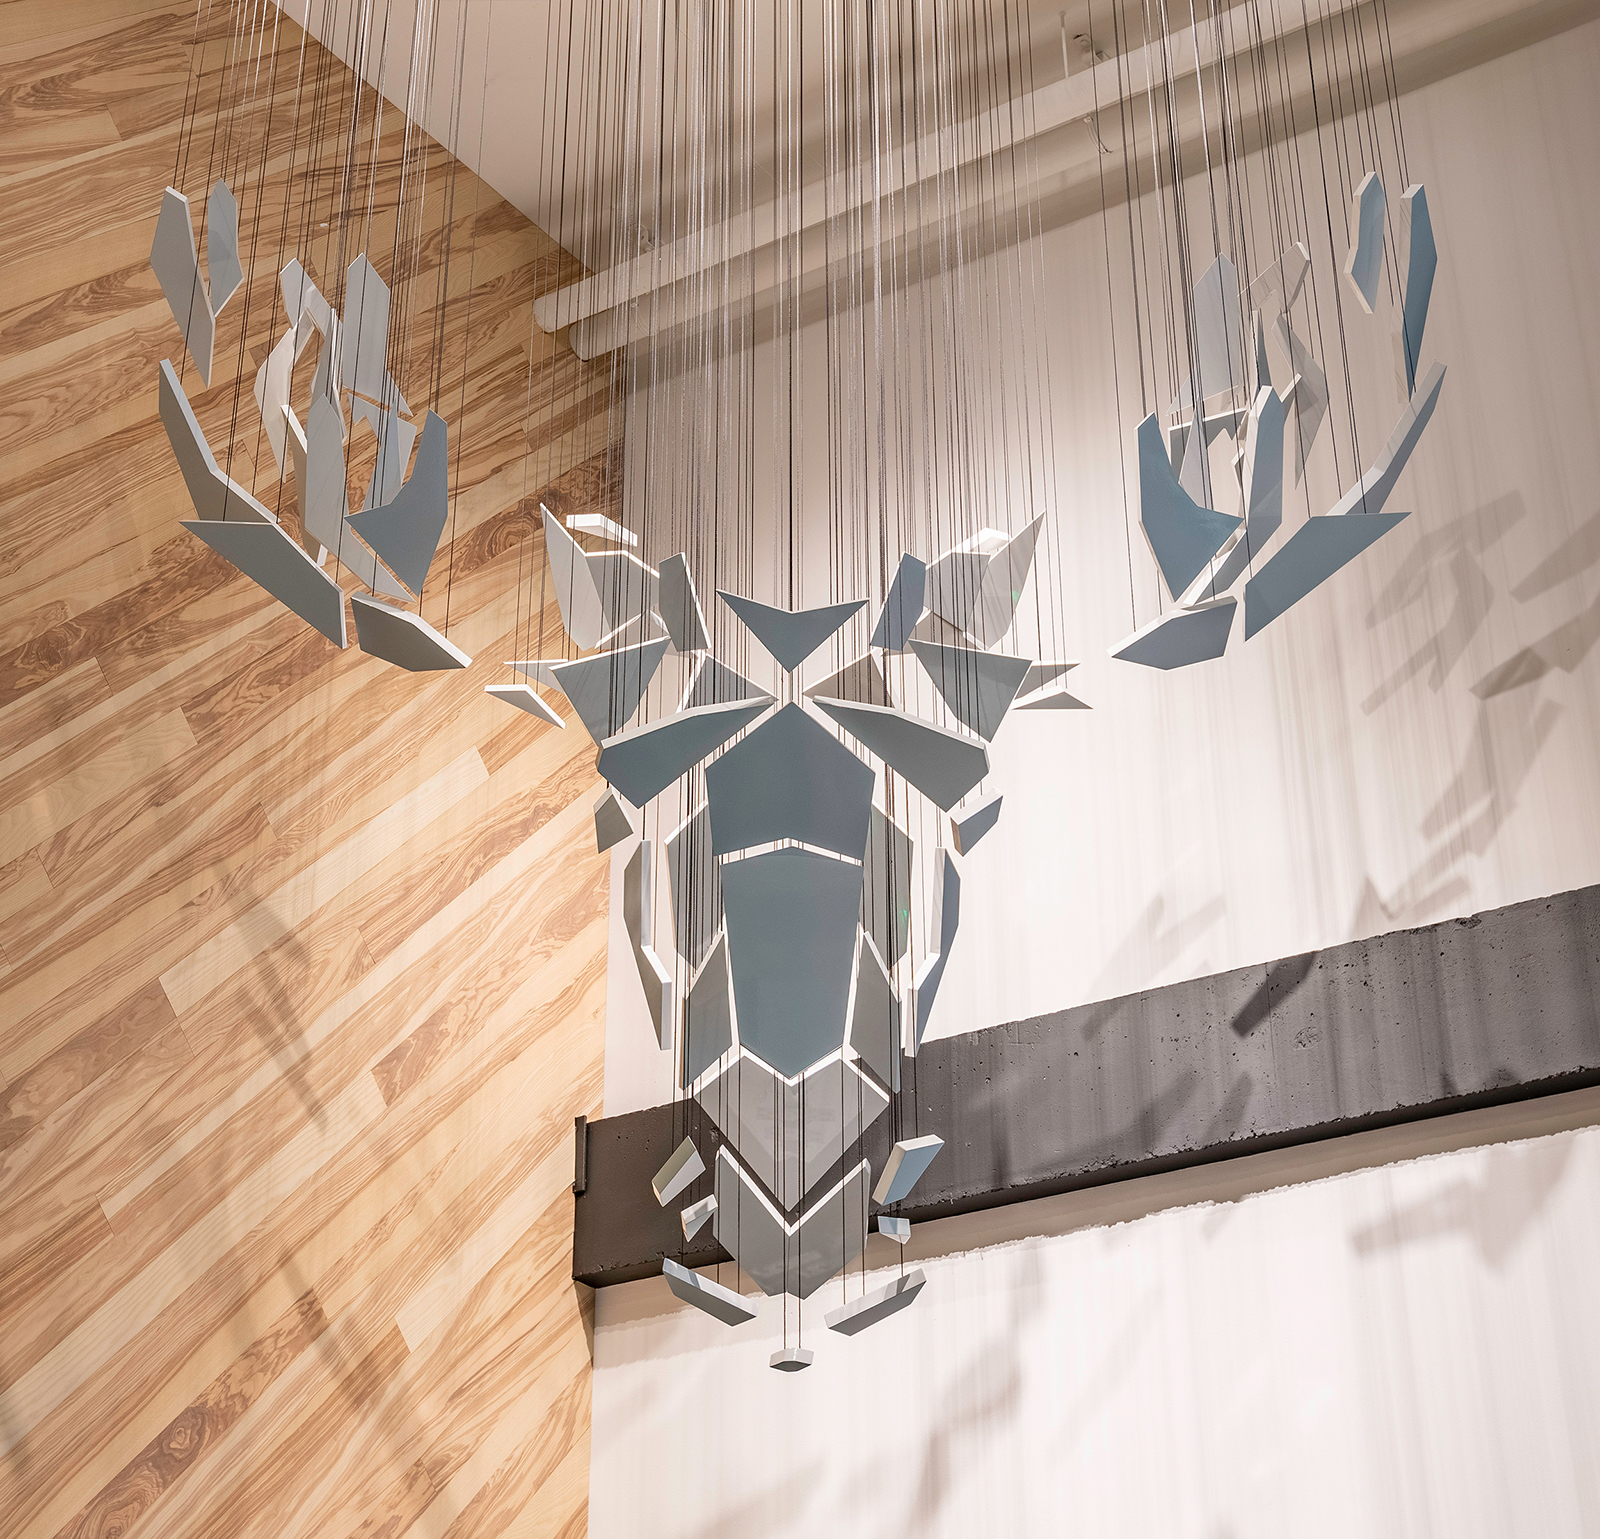
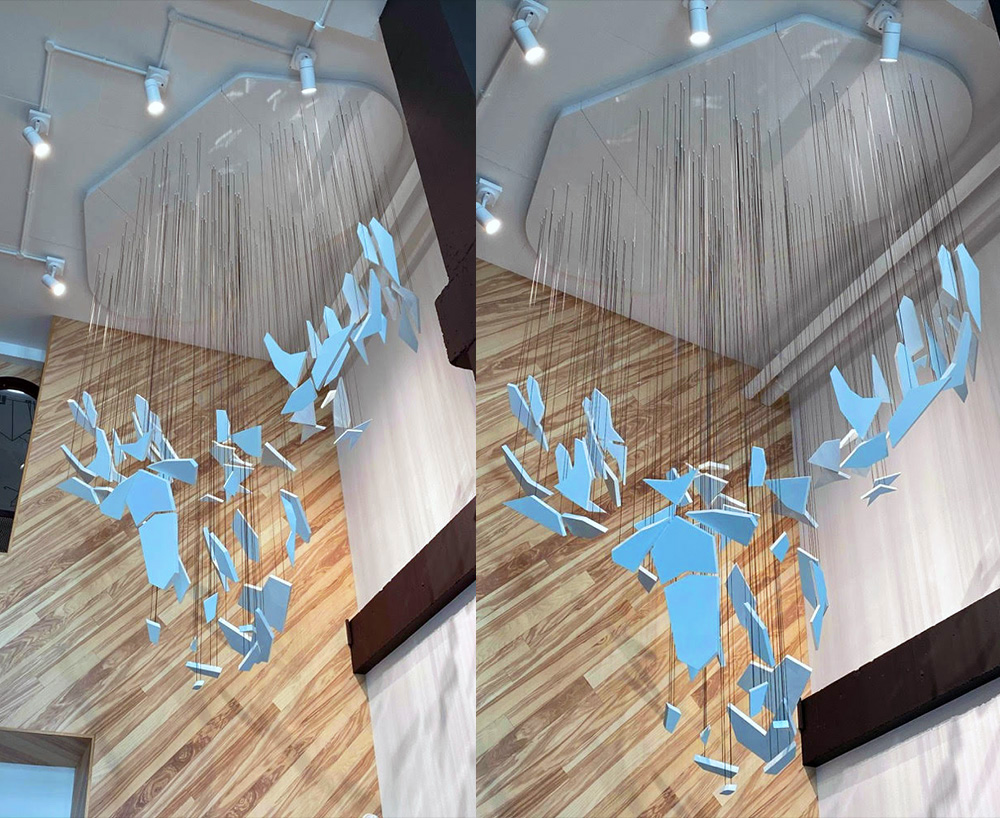
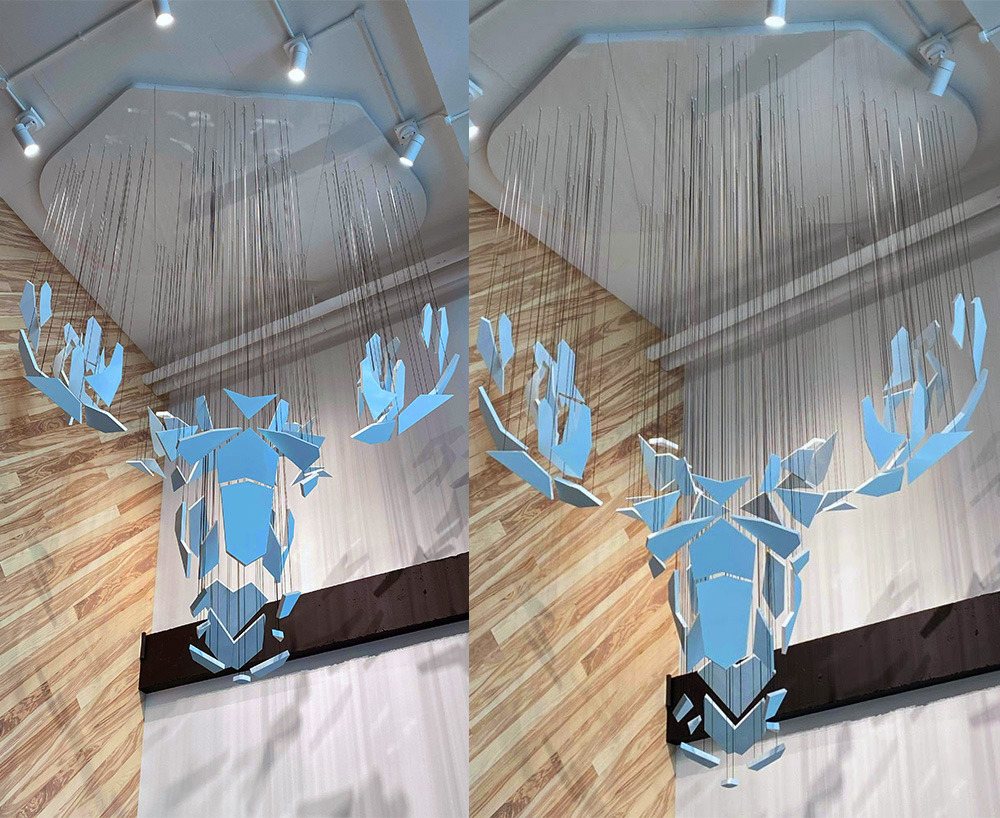
We were involved in the development of a complex bespoke hanging feature for an office reception, whereby the exploded components were hung at varying heights and at such an angle as to appear as random geometric shapes. Until the viewer stands at a particular point on the floor that is, when the intended form is finally revealed – an abstract moose head!
Armed with a basic Sketchup model and a pricing/intent drawing, Step2 Design worked out a feasible construction method for the hanging parts using Solidworks. After a sample piece was signed off, Step2 Design proceeded to produce the necessary setting out and construction drawings, fixing templates and 3D visuals required to manufacture and install this striking and unique hanging feature.

Title Photo © The Electric Eye Photography
Concept Design
The start of the project involved a kick-off meeting with Artworks to run through the reference documentation and establish a brief. The most critical factor of the project was working out exactly where the viewer would need to stand in the entrance hall (and at what height) to see the Moose in perfect alignment. This involved recreating the entire reception area in Sketchup and adjusting the angle and rotation of the Moose to establish a sensible “X marks the spot” viewing location on the floor for an average viewer’s height.
To create the ‘Anamorphosis’ effect, the individual pieces were split and separated onto different planes in accordance with the setting out documentation provided by the client. This required some testing to make sure the pieces were suitably separated from one another – so that at all other angles – the hanging shapes would appear totally random.
Materials Research
Research was then performed on materials, manufacturing and a suitable fixing method, whilst a logical numbering system was devised so that each piece could be easily identified during the manufacturing process.
A fixing method was devised whereby a swage ball could be crimped onto a steel cable and then fed through a hole in the back of an aluminium back plate. This was then glued to a rebate in the back of each hanging panel.
White Valchromat was chosen over moisture-resistant MDF for the panels themselves, as it was much easier to prep, prime and wet-spray, and a nylon coated 7×7 steel cable was chosen for the hanging wire as the client specifically requested each wire to be black.
CAD Development
Firstly, two sample pieces (the smallest and largest) were cut using a CNC machine, with the panel rebates, identification numbers and small relief holes routed into the back of each piece. Next the aluminium was cut and all the pieces were wet-sprayed to the client-approved RAL colour. Following that, the sample cable lengths were cut and crimped and fed through an aluminium back plate before being bonded in situ. Subsequently, these were sent to the client for approval.
After receiving approval, the rest of the Moose was drawn up in Solidworks, and a 3D model of the finished CAD model was also sent to the client for approval.
There was some back and forth on the proposed shape for the ceiling rose (fixing tray), as lighting fixtures and sprinkler systems were being installed in the area and needed to be avoided. Additionally, the location of the viewing point on the floor meant the angle of the Moose wasn’t exactly 45 degrees to the corner, meaning both a square and rectangular ceiling rose looked strange in context. After a few proposals, a symmetrical shape with rounded corners was settled upon and renders were produced showing the finished design, superimposed onto the client’s rendered image of the space.
Final Steps
When this was approved, we began work on the technical drawings and installation information. Alongside that, we produced an Excel spreadsheet with all the drop heights of each cable so that these could be cut, crimped and labelled whilst the main panels were being cut.
In addition, we produced a manufacturing template, showing a plan view of the ceiling rose, with each hole labelled and numbered so it was clear which cable needed to go where. Lastly, a ground template was printed on canvas so the installation team could lay it onto the site floor to work out the exact angle the ceiling rose needed to be fixed at.
Due to an extremely tight turnaround time, there wasn’t enough time to prefabricate and test-hang the entire Moose in the factory and it was shipped straight to site. Unfortunately, this turned out to be a error as some of the cables warped when the unit was offered up to the ceiling, meaning the pieces didn’t hang straight. The unit had to be shipped back to the factory and thinner cables that wouldn’t warp were swapped in – a costly exercise! However, the finished product was incredible and the client, and us, were extremely pleased with the end result!
Trading Address
Step2 Design Limited HERE
470 Bath Road
Arnos Vale
Bristol BS4 3AP